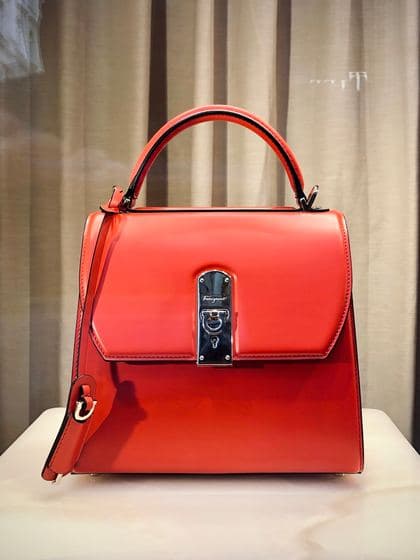
How to Remove a Product Photo Background for Free
Table of Contents
To remove a product photo background, upload a clear JPG, PNG, or WebP to the free AI background remover, let the tool isolate the product, inspect difficult edges, and export either a transparent PNG or a white-background JPG. Keep the original file, use consistent canvas dimensions across a catalogue, and review every result at full size before publishing.
A distracting product-photo background makes a catalogue look inconsistent and creates extra work for designers, marketplace teams, and store owners. A clean cutout solves that problem, but the export format and edge quality matter just as much as the initial removal. This guide explains how to remove a product photo background for free, when to choose transparency or white, how to inspect the result, and how to keep a batch visually consistent.
Background removal does not repair a blurred, compressed, or poorly lit source image. Start with the highest-quality original available. AI can separate a visible subject from its surroundings, but it cannot reliably reconstruct product detail that the camera never captured.
What Is a Product Background Remover?
A product background remover is an image-editing tool that identifies the foreground product and makes the surrounding pixels transparent. The resulting cutout can be downloaded as a PNG, placed on a solid color, or composited into a new scene. Unlike cropping, background removal follows the product outline rather than keeping a rectangular section of the original photo.
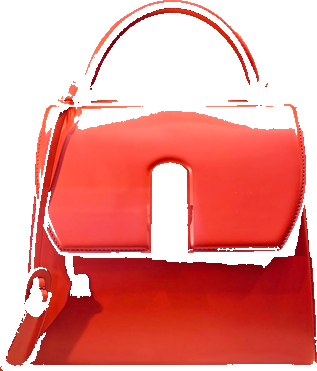
The practical goal is not simply “no background.” A useful ecommerce result should retain the complete product, preserve intentional openings and gaps, avoid halos, and fit a repeatable canvas. Shoes, bags, electronics, bottles, furniture, and packaged goods all present different edge conditions. Reflective surfaces, glass, fur, fine straps, shadows, and low-contrast boundaries require closer review than a solid object photographed against a contrasting wall.
Transparent PNG or White JPG: Which Output Should You Use?
Choose the output based on where the image will be used. Transparency is flexible for design work because the product can be placed over any color later. A white JPG is simpler for catalogues and channels that do not preserve transparent pixels. The free product background remover supports both workflows, so one clean cutout can become several finished assets.
| Output | Best use | Main advantage | Limitation |
|---|---|---|---|
| Transparent PNG | Design files, overlays, reusable product assets | Works on different backgrounds without removing the background again | Larger files; some upload systems replace transparency with black or white |
| White-background JPG | Store listings, catalogues, email, simple marketplaces | Small, predictable file with no transparency compatibility issue | The white background is permanently baked into the image |
| WebP with transparency | Modern websites | Often smaller than PNG while retaining transparency | Some older editing and commerce systems have weaker WebP support |
| PNG on a colored canvas | Social posts and branded graphics | Consistent campaign color with a clean product edge | Less reusable than the original transparent cutout |
How to Remove a Product Photo Background in 7 Steps
1. Choose the clearest original image
Use the original camera export when possible instead of a screenshot or an image downloaded from a messaging app. Compression can soften edges and create blocks around detailed areas. Select a photo where the complete product is visible, reasonably sharp, and separated from the background by color, brightness, texture, or depth.
2. Open the free AI background remover
Open the background remover online and upload a JPG, PNG, or WebP. For a catalogue, test one representative image before processing the full set. A good test image includes the same lighting, backdrop, camera angle, and difficult materials that appear across the rest of the shoot.
3. Let the tool isolate the product
The model estimates which pixels belong to the foreground subject and which belong to the background. Wait for the original-versus-result preview instead of assuming the first processing message means the image is finished. Large files and detailed products can take longer than simple objects.
4. Inspect edges at full size
Zoom in around handles, straps, hair-like fibers, transparent packaging, wheels, cables, and the space between product parts. Look for a bright fringe from the old background, missing product pixels, rough stair-step edges, or background fragments trapped inside an opening. A thumbnail can hide defects that become obvious on a product page.
5. Refine the cutout only where necessary
Use edge refinement conservatively. Excessive smoothing can erase thin details, while aggressive feathering can make the entire product look soft. Compare the edited edge with the original. The correct result preserves the real boundary instead of producing the smoothest possible silhouette.
6. Select a transparent or white output
Download a transparent PNG when designers may reuse the product in banners, comparison graphics, or seasonal campaigns. Choose a white-background JPG when the destination requires a simple finished photo. If the tool provides a product preset, keep canvas size, padding, product scale, and background color consistent across the whole collection.
7. Download, rename, and archive both versions
Keep the original, the transparent master, and the final channel-specific export. Use descriptive file names such as blue-travel-bag-transparent.png and blue-travel-bag-white-2000.jpg. This prevents future teams from removing the same background again and makes the correct asset easier to locate.
Create one approved “golden image” before processing a batch. Record its canvas size, padding, output format, background color, and shadow treatment. Use that reference to judge every later export instead of making independent visual decisions for each product.
Product Photo Quality Checklist
A background-free image can still look unprofessional if product scale, margins, or output settings vary. Review the cutout and its final canvas as separate quality checks. The first protects product detail; the second protects catalogue consistency.
| Check | Pass condition | Common failure | Correction |
|---|---|---|---|
| Product completeness | Every visible product part remains | Thin straps, cables, or corners disappear | Reduce edge removal or restore the missing area |
| Edge cleanliness | No old-background halo at normal viewing size | White or colored fringe surrounds the product | Refine the boundary without over-feathering |
| Catalogue consistency | Products use the same canvas, margins, and visual scale | Each listing appears to use a different template | Apply one approved preset across the batch |
| Shadow treatment | Shadow looks intentional and consistent | Part of the original floor remains as a dirty patch | Remove it or apply a controlled replacement shadow |
| File format | Destination supports the selected output | Transparency renders incorrectly after upload | Use a white JPG or test WebP/PNG compatibility first |
| Resolution | Product detail remains sharp at the intended display size | Source is enlarged beyond its useful resolution | Return to the original camera file |
How to Create a White-Background Product Photo
First create a clean transparent cutout. Then place it on a solid white canvas instead of trying to brighten the old backdrop until it appears white. Removing the original background prevents visible corners, uneven gray areas, color casts, and backdrop wrinkles from surviving in the finished image.
Use pure white when a destination calls for it, but verify the latest rules of the marketplace or catalogue receiving the file. Requirements can differ by category and can change. A preset is a production shortcut, not official certification. Keep enough margin around the product to avoid accidental cropping in responsive galleries and mobile thumbnails.
For a store with many products, consistency matters more than choosing an arbitrary large canvas. Use the same square dimensions, align similar items to the same visual baseline, and keep comparable products at comparable scale. The white-background product photo tool includes seller-oriented output presets, while the free image tools hub provides complementary resize, crop, format-conversion, and compression workflows.
How to Make a Transparent PNG for Design Work
PNG transparency stores an alpha value for each pixel, allowing areas around the subject to remain invisible. After removal, verify transparency in an editor or preview that displays a checkerboard. A white preview alone does not prove that the file is transparent; it may be an opaque white background.
Do not convert the transparent master to JPEG because JPEG does not preserve transparency. Keep the PNG master and create separate JPG copies for destinations that need an opaque background. For web publishing, consider a WebP derivative when your platform supports it, but retain the PNG as the broadly compatible editable master.
If the transparent product will be placed on both light and dark backgrounds, test both. A pale halo may disappear on white but become visible on navy or black. Conversely, an overly dark edge can look clean on black and dirty on a light campaign banner.
Batch Background Removal Without Inconsistent Results
Batch processing saves time only when the source photos and output rules are reasonably consistent. Group images by shoot, product type, backdrop, and required destination. Process a small sample, approve the settings, and then run the matching group. Do not mix studio packshots, outdoor lifestyle photos, and glass products into one unattended quality check.
The batch workflow can process up to 20 images and package the results as a ZIP. Retry failed items separately rather than restarting successful files. Review the result table and open a few images from the beginning, middle, and end of the batch. For high-value catalogues, inspect every final asset.
Common Background Removal Mistakes
- Using a screenshot: screenshots often reduce detail and introduce scaling artifacts.
- Checking only the thumbnail: small previews hide halos, holes, and rough edges.
- Deleting the transparent master: this forces the background-removal step to be repeated for every campaign.
- Applying one setting to unrelated materials: glass, fabric, metal, and fur require different scrutiny.
- Changing canvas rules mid-catalogue: inconsistent margins and product scale make listings look disorderly.
- Assuming a preset guarantees compliance: channel and category requirements must still be checked.
- Start with the highest-resolution original; background removal cannot restore detail missing from the source.
- Use transparent PNG as the reusable master and create white JPG or WebP derivatives for specific channels.
- Inspect difficult boundaries at full size, especially straps, glass, cables, fur, and reflective packaging.
- Approve one golden image before processing a batch of up to 20 files with matching settings.
- Keep canvas size, padding, product scale, and shadow treatment consistent across a catalogue.
Frequently Asked Questions
Can I remove a product photo background for free?
Yes. Upload the image to the free background remover, inspect the cutout, and download a transparent PNG or finished white-background image without a watermark.
What format keeps the background transparent?
PNG supports transparent pixels and is the safest general-purpose choice for a reusable cutout. WebP can also preserve transparency when the destination supports it. JPEG does not support transparency.
Should product photos use transparent or white backgrounds?
Keep a transparent master for reuse, then export white-background JPG copies when a store, catalogue, or marketplace requires an opaque finished image.
Why does a removed background have a white outline?
The outline usually comes from partially retained pixels that blended with the original light background. Inspect the alpha edge and refine the boundary carefully without erasing real product detail.
Can I remove backgrounds from multiple product photos?
Yes. The batch mode supports up to 20 images and ZIP export. Use one approved set of output settings for visually related products, then review the individual results.
Does background removal reduce image quality?
The cutout can preserve the source resolution, but quality still depends on the original image and export format. Avoid enlarging a low-resolution source and keep the original file alongside every derivative.
Frequently Asked Questions
Our Methodology
All background remover content on CalculatorApp.me is reviewed by subject-matter experts, cross-referenced with official sources, and updated regularly for accuracy. Our formulas and data are verified against industry standards and government publications.
Jordan Hayes
Verified AuthorPersonal Finance Content Strategist
Jordan is a personal finance content strategist with 9+ years writing about mortgages, retirement, tax strategy, and budgeting. Every guide is cross-referenced with IRS publications, Federal Reserve data, and CFPB guidance to make complex calculations accessible. Editor at CalculatorApp.me.
Found this helpful? Share it!
Stay Updated
Get notified when we launch new calculators and features.
No spam. Unsubscribe anytime.